主题
文档元素
LaTeX 是一门排版语言,它通过各种命令和环境来排版不同的文档元素。
章节和目录
章节标题
LaTeX 提供了以下命令用于排版章节标题:
latex
\chapter{title}
\section{title}
\subsection{title}
\subsubsection{title}
\paragraph{title}
\subparagraph{title}
这些命令自动生成编号、目录项和页眉页脚。它们有以下几点特性:
- 层级关系:
\chapter是最高层级(仅限 report 和 book 文档类),接下来依次是\section、\subsection、\subsubsection、\paragraph、\subparagraph,共6级标题; - 带可选参数的变体:
\section[short title]{title}标题使用{title}参数,在目录和页眉页脚中使用{short title}参数; - 带星号的变体:
\section*{title}标题不带编号,也不生成目录项和页眉页脚。
目录
LaTeX 提供了 \tableofcontents 命令来自动生成目录:
latex
\tableofcontents该命令生成的目录项来自于各章节命令(不带星号的变体),格式由文档类定义。\listoffigures 和 \listoftables 命令分别生成图表目录,它们的目录项来自于图表的标题命令。
如果希望在目录中添加自定义的目录项,可使用 \addcontentsline 命令:
latex
\addcontentsline{toc}{level}{title}例如:
latex
\addcontentsline{toc}{section}{自定义目录项}其中 {level} 为章节层次 chapter 或 section 等,{title} 为出现于目录项的章节标题。。
文档结构的划分
LaTeX 的主要命令 \include 和 \input 用于将文档划分为多个文件。\include 命令用于将章节级别的文件包含到主文档中,它会在文件之间自动插入 \clearpage 命令:
latex
\include{filename}\input 命令用于将任意文件包含到主文档中,不会自动插入 \clearpage 命令:
latex
\input{filename}标题页
report 和 book 文档类提供了 \maketitle 命令来生成标题页,该命令使用 \title、\author 和 \date 命令设置的内容:
latex
\title{title}
\author{author}
\date{date}
\maketitle\title、\author 和 \date 命令应出现在 \begin{document} 之前。
如果希望自定义标题页,可使用 titlepage 环境:
latex
\begin{titlepage}
    % 标题页内容
\end{titlepage}
例如:
latex
\documentclass{article}
\begin{document}
\begin{titlepage}
    \centering
    \vspace*{ill}
    \Huge{Custom Title Page}
    \vspace{2em}
    \large{Author Name}
    \vspace{1em}
    \today
    \vspace*{ill}
\end{titlepage}
\end{document}
交叉引用
LaTeX 提供了 \label 和 \ref 命令来实现交叉引用:
latex
\label{label-name}
\ref{label-name}
\label 命令用于为文档元素添加标签,\ref 命令用于引用该标签。\label 命令应紧跟在要引用的文档元素之后,例如:
latex
\section{Introduction}\label{sec:intro}

See Section \ref{sec:intro} for more details.
\pageref 命令用于引用标签所在的页码:
latex
See page \pageref{sec:intro} for more details.\autoref 命令(需要 hyperref 宏包)用于自动添加引用类型(如 "Section"、"Figure" 等):
latex
\autoref{sec:intro}脚注和边注
LaTeX 提供了 \footnote 命令用于添加脚注:
latex
\footnote{footnote}例如:
latex
This is a sentence with a footnote.\footnote{This is the footnote text.}\footnotemark 和 \footnotetext 命令用于将脚注标记与脚注文本分离:
latex
\footnotemark
\footnotetext{footnote}
\sidenote 命令(需要 sidenotes 宏包)用于添加边注:
latex
\sidenote{sidenote}特殊环境
列表
LaTeX 提供了三种列表环境:enumerate(有序列表)、itemize(无序列表)和 description(描述列表)。
有序列表
latex
\begin{enumerate}
    \item Item 1
    \item Item 2
    \item Item 3
\end{enumerate}
无序列表
latex
\begin{itemize}
    \item Item 1
    \item Item 2
    \item Item 3
\end{itemize}
描述列表
latex
\begin{description}
    \item[Term 1] Definition 1
    \item[Term 2] Definition 2
    \item[Term 3] Definition 3
\end{description}
列表环境可以嵌套使用:
latex
\begin{enumerate}
    \item Item 1
    \begin{enumerate}
        \item Nested item 1
        \item Nested item 2
    \end{enumerate}
    \item Item 2
\end{enumerate}
列表环境的样式可以通过 \renewcommand 命令自定义,例如:
latex
\renewcommand{\labelenumi}{\arabic{enumi}.}对齐环境
LaTeX 提供了 center、flushleft 和 flushright 环境用于文本对齐:
latex
\begin{center}… \end {center}
\begin{flushleft}… \end {flushleft}
\begin{flushright}… \end {flushright}
例如:
latex
\begin {center}
    Centered text using a
  \verb|center| environment.
\end {center}

\begin {flushleft}
    Left-aligned text using a
  \verb|flushleft| environment.
\end {flushleft}

\begin {flushright}
    Right-aligned text using a
  \verb|flushright| environment.
\end {flushright}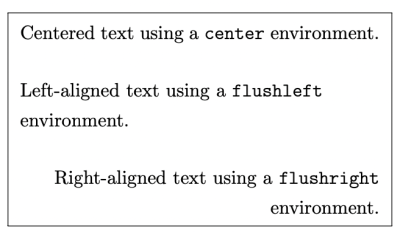
引用环境
LaTeX 提供了 quote、quotation 和 verse 环境用于排版引用:
latex
\begin{quote}… \end{quote}
\begin{quotation}… \end{quotation}
\begin{verse}… \end{verse}
quote 环境用于排版较短的引用,quotation 环境用于排版较长的引用,verse 环境用于排版诗歌。
例如:
latex
\begin {quote}
    This is a short quotation.
\end {quote}

\begin {quotation}
    This is a longer quotation. It spans multiple lines and is indented on both sides.
    This is the second paragraph of the quotation.
\end {quotation}

\begin {verse}
    This is a line of poetry. \
    This is another line of poetry. \
    And another.
\end {verse}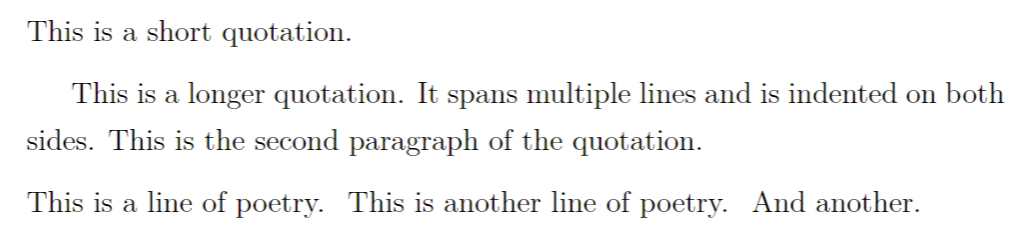
摘要环境
LaTeX 提供了 abstract 环境用于排版摘要:
latex
\begin{abstract}
    This is the abstract of the document.
\end{abstract}
该环境仅适用于 article 文档类,它会自动添加 "Abstract" 标题。
代码环境
LaTeX 提供了 verbatim 环境用于排版代码:
latex
\begin{verbatim}
    // This is a code snippet
    function hello() {
        console.log("Hello, world!");
    }
\end{verbatim}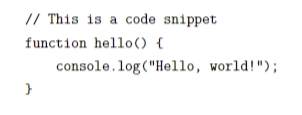
verbatim 环境会保留代码中的所有空格和换行,并使用等宽字体。verbatim* 环境(带星号)会显示空格:
latex
\begin{verbatim*}
for (int i=0; i<4; ++i)
    printf("Number %d\n",i);
\end{verbatim*}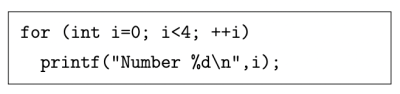
要排版简短的代码或关键词,可使用 \verb 命令:
latex
\verb|code|| 标明代码的分界位置,前后必须一致,除字母、空格或星号外,可任意选择使得不与代码本身冲突,习惯上使用 | 符号。
同 verbatim 环境,\verb 后也可以带一个星号,以显示空格:
latex
\verb| code with spaces |表格
LaTeX 提供了多种环境用于排版表格,最常用的是 tabular 环境。
tabular 环境
tabular 环境用于排版简单的表格:
latex
\begin{tabular}
    单元格内容 & 单元格内容 & ... \\
    ...
\end{tabular}
基本用法
列格式参数指定了表格的列数和每列的格式,常用的格式有:
l:左对齐c:居中对齐r:右对齐p{width}:指定列宽,文本自动换行(段落)|:绘制垂直线*{n}{format}:重复格式 n 次
例如:
latex
\begin{tabular}{|l|c|r|}
    \hline
    Left & Center & Right \\
    \hline
    1 & 2 & 3 \\
    4 & 5 & 6 \\
    \hline
\end{tabular}
\hline 命令用于绘制水平线,& 用于分隔单元格,\\ 用于换行。
垂直对齐控制
tabular 环境有一个可选参数用于控制表格的垂直对齐方式:
latex
\begin{tabular}[position]{列格式}
    ...
\end{tabular}
position 可以是 t(顶部对齐)、b(底部对齐)或 c(居中对齐,默认值)。
例如:
latex
\begin{tabular}[t]{lcr}
    top & aligned & table
\end{tabular}
table 浮动体环境
tabular 环境生成的表格不会自动换行,它通常与 table 环境结合使用,将表格转换为浮动体,以便 LaTeX 自动调整其位置:
latex
\begin{table}[位置参数]
    \caption{表格标题}\label{tab:label}
    \begin{tabular}{列格式}
        ...
    \end{tabular}
\end{table}
[位置参数] 用于指定浮动体的允许位置,常用的参数有:
h:此处(here),尽可能放在当前位置t:页顶(top),放在当前页或下一页的顶部b:页底(bottom),放在当前页或下一页的底部p:单独一页(page),放在专门的浮动页!:忽略 LaTeX 的默认限制,强制按指定位置放置
\caption 命令用于添加表格标题,它会自动生成编号。\label 命令用于为表格添加标签,以便交叉引用。
列格式详解
重复格式
LaTeX 提供了简便的将格式参数重复的写法 *{n}{column-spec},比如以下两种写法是等效的:
latex
\begin{tabular}{|c|c|c|c|c|p{4em}|p{4em}|}
\begin{tabular}{|*{5}{c|}*{2}{p{4em}|}}
整列修饰
有时需要为整列修饰格式,比如整列改变为粗体,如果每个单元都加上 \bfseries 命令会比较麻烦。array 宏包提供了辅助格式 > 和 <,用于给格式前后加上修饰命令:
latex
\begin{tabular}{>{\itshape }r<{*}l}
    \hline
    italic & normal \\
    column & column \\
    \hline
\end{tabular}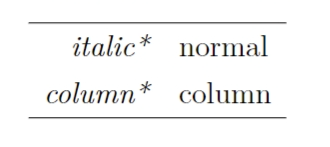
辅助格式甚至支持插入 \centering 等命令改变 p 列格式的对齐方式,一般还要加额外的命令 \arraybackslash 以免出错:
latex
\begin{tabular}{>{\centering\arraybackslash }p{9em}}
    \hline
    centered text in paragraph column \\
    second line \\
    \hline
\end{tabular}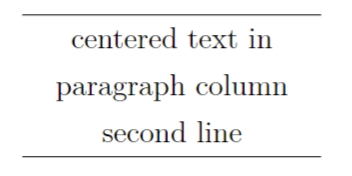
定宽表格
LaTeX 提供了 tabularx 环境(需要 tabularx 宏包)用于排版定宽表格:
latex
\begin{tabularx}{width}{列格式}
    ...
\end{tabularx}
width 为表格的总宽度,X 列格式用于自动调整列宽,例如:
latex
\begin{tabularx}{\linewidth}{|l|X|}
    \hline
    Column 1 & Column 2 (automatic width) \\
    \hline
    Short text & This is a long text that will be wrapped automatically. \\
    \hline
\end{tabularx}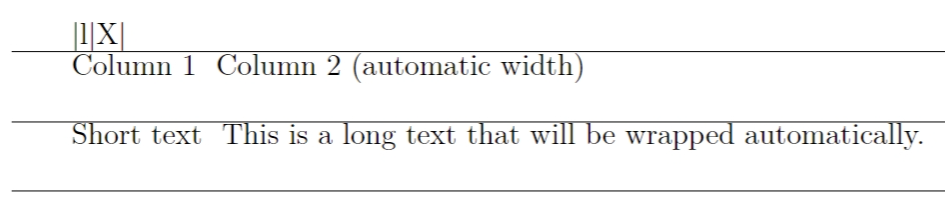
横线
除了 \hline 命令,LaTeX 还提供了以下命令用于绘制横线:
\toprule,\midrule,\bottomrule:booktabs 宏包提供的更美观的横线(需要加载\usepackage{booktabs})\cline{i-j}:绘制从第 i 列到第 j 列的横线
例如:
latex
\begin{tabular}{lcr}
    \toprule
    Left & Center & Right \\
    \midrule
    1 & 2 & 3 \\
    4 & 5 & 6 \\
    \bottomrule
\end{tabular}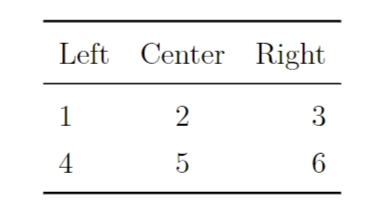
单元格合并
跨行合并
使用 \multirow{行数}{宽度}{内容} 命令可以实现单元格的跨行合并(需要加载 \usepackage{multirow}):
latex
\begin{tabular}{|c|c|}
    \hline
    \multirow{2}{*}{Multirow} & Row 1 \\
    & Row 2 \\
    \hline
\end{tabular}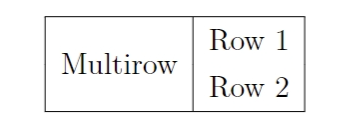
跨列合并
使用 \multicolumn{列数}{列格式}{内容} 命令可以实现单元格的跨列合并:
latex
\begin{tabular}{|c|c|c|}
    \hline
    1 & 2 & 3 \ \\
    \multicolumn{2}{|c|}{Merged} & 4 \ \\
    \hline
\end{tabular}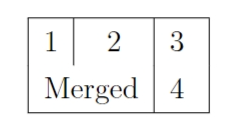
嵌套表格
tabular 环境可以嵌套使用,例如:
latex
\begin{tabular}{|c|c|}
    \hline
    Top-left & Top-right \\
    \hline
    \begin{tabular}{cc}
        Nested 1 & Nested 2 \\
        Nested 3 & Nested 4 \\
    \end{tabular} & Bottom-right \\
    \hline
\end{tabular}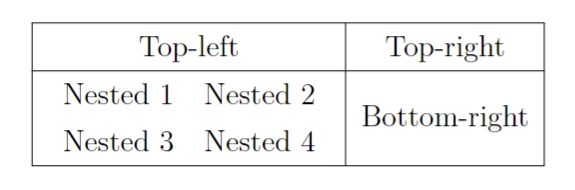
行距控制
LaTeX 提供了 \arraystretch 命令用于调整表格的行距:
latex
\renewcommand{\arraystretch}{1.5}该命令会将表格的行距增加为默认值的1.5倍。
图片
LaTeX 本身不支持插图功能,需要由 graphicx 宏包辅助支持。
使用 latex + dvipdfmx 编译命令时,调用 graphicx 宏包时要指定 dxipdfmx 选项;而使用 pdflatex 或 xelatex 命令编译时不需要。
读者可能听说过 “ LaTeX 只能插入 .eps 格式的图片,需要把 .jpg 转换成 .eps 格式” 的观点。 LaTeX 发展到今天,这个观点早已过时。事实上不同的编译命令支持的图片格式范围各异,见表 3.2 。这个表格也能解决诸如 “为什么 .eps 格式图片在 pdflatex 编译命令下出错” 之类的问题。本表格也再一次说明,使用 xelatex 命令是笔者最推荐的方式。
注:在较新的 TEX 发行版中,latex + dvipdfmx 和 pdflatex 命令可不依赖宏包,支持原来需要宏包扩展的图片格式(但 pdflatex 命令仍不支持除 .jpg 和 .png 以外的位图)。
在调用了 graphicx 宏包以后,就可以使用 \includegraphics 命令加载图片了:
\includegraphics{option}{filename}
其中 {filename} 为图片文件名,与使用 \include 命令类似,文件名有时需要使用相对或绝对路径(见1.6 节)。图片文件的扩展名可写可不写。
另外 graphicx 宏包还提供了 \graphicspath 命令,用于声明一个或多个图片文件存放的目录,使用这些目录里的图片时可不用写路径:
假设主要的图片放在 figures 子目录下,标志放在 logo 子目录下
latex
\graphicspath {{figures}{logo}}\graphicspath 命令的参数是一个或多个目录名,每个目录名都要包含在大括号里。
\inclusegraphics 命令的可选参数 {option} 支持 {key}={value} 形式赋值,常用的参数如下:
盒子
盒子是 LaTeX 排版的基础单元,虽然解释上去有些抽象:每一行是一个盒子,里面的文字从左到右依次排列:每一页也是一个盒子,各行文字从上到下依次排布……颇有一些活字印刷术的味道。
不管如何,LaTeX 提供了一些命令让我们生成一些有特定用途的盒子。
水平盒子
生成水平盒子的命令如下:
latex
\mbox{…}
\makebox{width}{align}{…}
\mbox 生成一个基本的水平盒子,内容只有一行,不允许分段(除非嵌套其他盒子,比如后文的垂直盒子)。外表看上去,\mbox 的内容与正常的文本无二,不过断行时文字不会从盒子里断开。
\makebox 更进一步,可以加上可选参数用于控制盒子的宽度 {width},以及内容的对齐方式 {align},可选居中 c (默认值)、左对齐1、右对齐 r 和分散对齐 s 。
latex
|\mbox{Test some words.}|\\
|\makebox{10em}{Test some words.}|\\
|\makebox{10em}{l}{Test some words.}|\\
|\makebox{10em}{r}{Test some words.}|\\
|\makebox{10em}{s}{Test some words.}|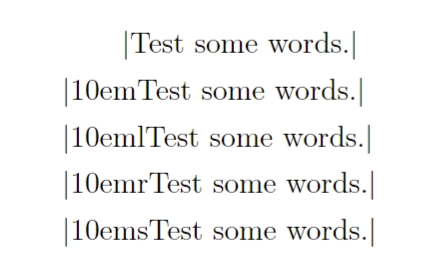
带框的水平盒子
\fbox 和 \framebox 让我们可以为水平盒子添加边框。使用的语法与 \mbox 和 \makebox 一模一样:
latex
\fbox{…}
\framebox{width}{align}{…}
\fbox{Test some words.}\\
\framebox{10em}{r}{Test some words.}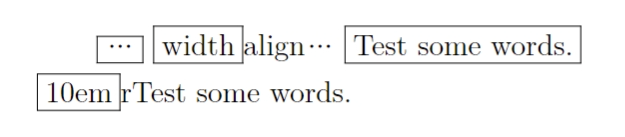
可以通过 \setlength 命令调节边框的宽度 \fboxrule 和内边距 ` \fboxsep:
latex
\framebox{10em}{r}{Test box}\\{1ex}
\setlength{\fboxrule}{1.6pt}
\setlength{\fboxsep}{1em}
\framebox{10em}{r}{Test box}
垂直盒子
如果需要排版一个文字可以换行的盒子,LaTeX 提供了两种方式:
latex
\parbox{align}{height}{inner-align}{width}{…}
\begin{minipage}{align}{height}{inner-align}{width}
…
\end{minipage}
其中 {align} 为盒子和周围文字的对齐情况(类似 tabular 环境);{height} 和 {inner-align} 设置盒子的高度和内容的对齐方式,类似水平盒子 \makebox 的设置,不过 {inner-align} 接受的参数是顶部 t、底部 b、居中 c 和分散对齐 s。
latex
三字经:\parbox{t}{3em}%
{人之初 性本善 性相近 习相远}
\quad
千字文:
\begin{minipage}{b}{8ex}{t}{4em}
天地玄黄 宇宙洪荒
\end{minipage}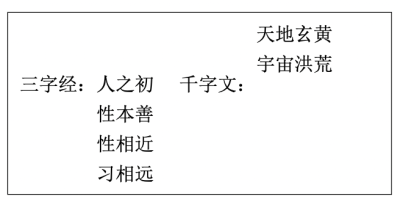
如果在 minipage 里使用 \footnote 命令,生成的脚注会出现在盒子底部,编号是独立的,并且使用小写字母编号。这也是 minipage 环境之所以被称为“迷你页”(Mini-page)的原因。而在 \parbox 里无法正常使用 \footnote 命令,只能在盒子里使用 \footnotemark,在盒子外使用 \footnotetext。
latex
\fbox{\begin{minipage}{15em}%
    这是一个垂直盒子的测试。
    \footnote{脚注来自 minipage。}
\end{minipage}}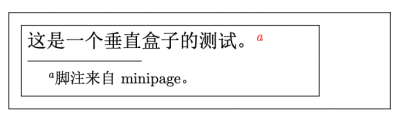
标尺盒子
LaTeX 提供了 \rule 命令用于绘制标尺盒子:
latex
\rule{width}{height}例如:
latex
\rule{2cm}{0.5cm}该命令会绘制一个宽度为2厘米、高度为0.5厘米的黑色矩形。
浮动体
浮动体的标题
浮动体的标题由 \caption 命令生成,它会自动添加编号和标题文本。\caption 命令有一个可选参数,用于在目录中显示不同的标题:
latex
\caption[Short caption]{Long caption}并排和子图表
使用 minipage 环境可以将多个图表并排放置:
latex
\begin{figure}[h]
    \begin{minipage}{0.48\linewidth}
        \centering
        \includegraphics[width=\linewidth]{image1}
        \caption{First image}
        \label{fig:first}
    \end{minipage}
    \hfill
    \begin{minipage}{0.48\linewidth}
        \centering
        \includegraphics[width=\linewidth]{image2}
        \caption{Second image}
        \label{fig:second}
    \end{minipage}
\end{figure}
subfig 宏包提供了 \subfigure 命令用于排版子图表:
latex
\begin{figure}[h]
    \centering
    \subfigure[First subfigure]{\includegraphics[width=0.48\linewidth]{image1}\label{subfig:first}}
    \subfigure[Second subfigure]{\includegraphics[width=0.48\linewidth]{image2}\label{subfig:second}}
    \caption{Two subfigures}
    \label{fig:two}
\end{figure}
这样可以生成带有字母编号的子图表标题,例如 "Figure 1a" 和 "Figure 1b"。